Behind the Scenes: Interior Finishes
People often ask me: What is the design process? How do we get from an idea to a permit-approved set of plans? The answer varies depending on the project’s location, size, and type. But there are few common denominators. Enter… drum roll please!…
Behind the Scenes! A series of posts to help you understand what I’m doing back here. You know, behind the scenes.
Interiors!
When designing your place, there are SO many decisions to make. How would you like your space to function? Who should build it? What do we compromise to stick to the budget? And on and on.
Towards the end are some of the most important (and exhausting) decisions for the overall look of your space: INTERIOR SPECIFICATIONS. It’s important to keep you energy up for this part. If you have the right attitude and the right help (hi!) this can even be fun!
Basic list of interior specs your builder will want to know:
Cabinet style & finish
Countertops
Tile (including flooring, backsplashes, and shower/tub surrounds)
Flooring (wood, carpet, vinyl, etc)
Decorative Light Fixtures
Plumbing Fixtures (sinks, faucets, bathtubs, toilets, etc)
Appliances
Case & Base (a shorthand reference to the window & door casing as well as the baseboard trim)
Wall & Ceiling Paint Colors
*Because I love you, here’s a sample of the Interior Specifications spreadsheet I use with my clients.
And here’s how I work through the process with my clients:
1. Make your shopping list!
I love a good list. Review your plans and start your shopping list. Note any special requirements. For now, this can be quick and basic. Later, you’ll add a bunch of detail and it will turn it into a Finish Schedule.* Doesn’t that sounds fancy?
2. Pick your stores.
You’ll need a store for each material. If you find a store offering more than one material, even better! For example, countertop stores often sell tile. You can find these stores on the internet but I try to rely on recommendations from friends or designers (hi!).
Then plan your route. I try to shop for materials in order of smallest selection to largest. For example, you’ll usually have fewer choices of cabinet/ countertop combinations that you have choices of flooring. Here’s the order I prefer to shop:
Cabinets & Countertops > Flooring > Bathroom & Kitchen Tile > Appliances, Plumbing, and Light Fixtures mixed in whenever it’s convenient.
Case & Base and Paint Colors can be chosen as you get deeper into construction.
Be sure to note addresses and operating hours of the stores. Then print out your list as a quick reference guide for yourself and whoever else is shopping with you.
3. Go shopping! WOOHOO!
Use your shopping list as your guide. For the sake of time, I usually spend one or two long days shopping with my clients (wear comfy shoes!). But if you’re doing this DIY, you can proceed at whatever pace you like.
As you visit each store, get the contact information of the representative who helps you. This is especially important in Appliance, Light, and Plumbing Fixture stores. The specification lists can get complicated, lean on your reps to provide the details. For example, your lighting rep should be able to specify all the correct bulbs for the fixtures you choose.
Also make sure to get samples of the materials you’ve chosen. They will help you make decisions as you work your way down the list. Sometimes the stores will only loan samples for a short time, this is one reason to get all the shopping done in a day or two.
Oh and bring a buddy (hi!). You’ll definitely want a second opinion, these are big decisions.
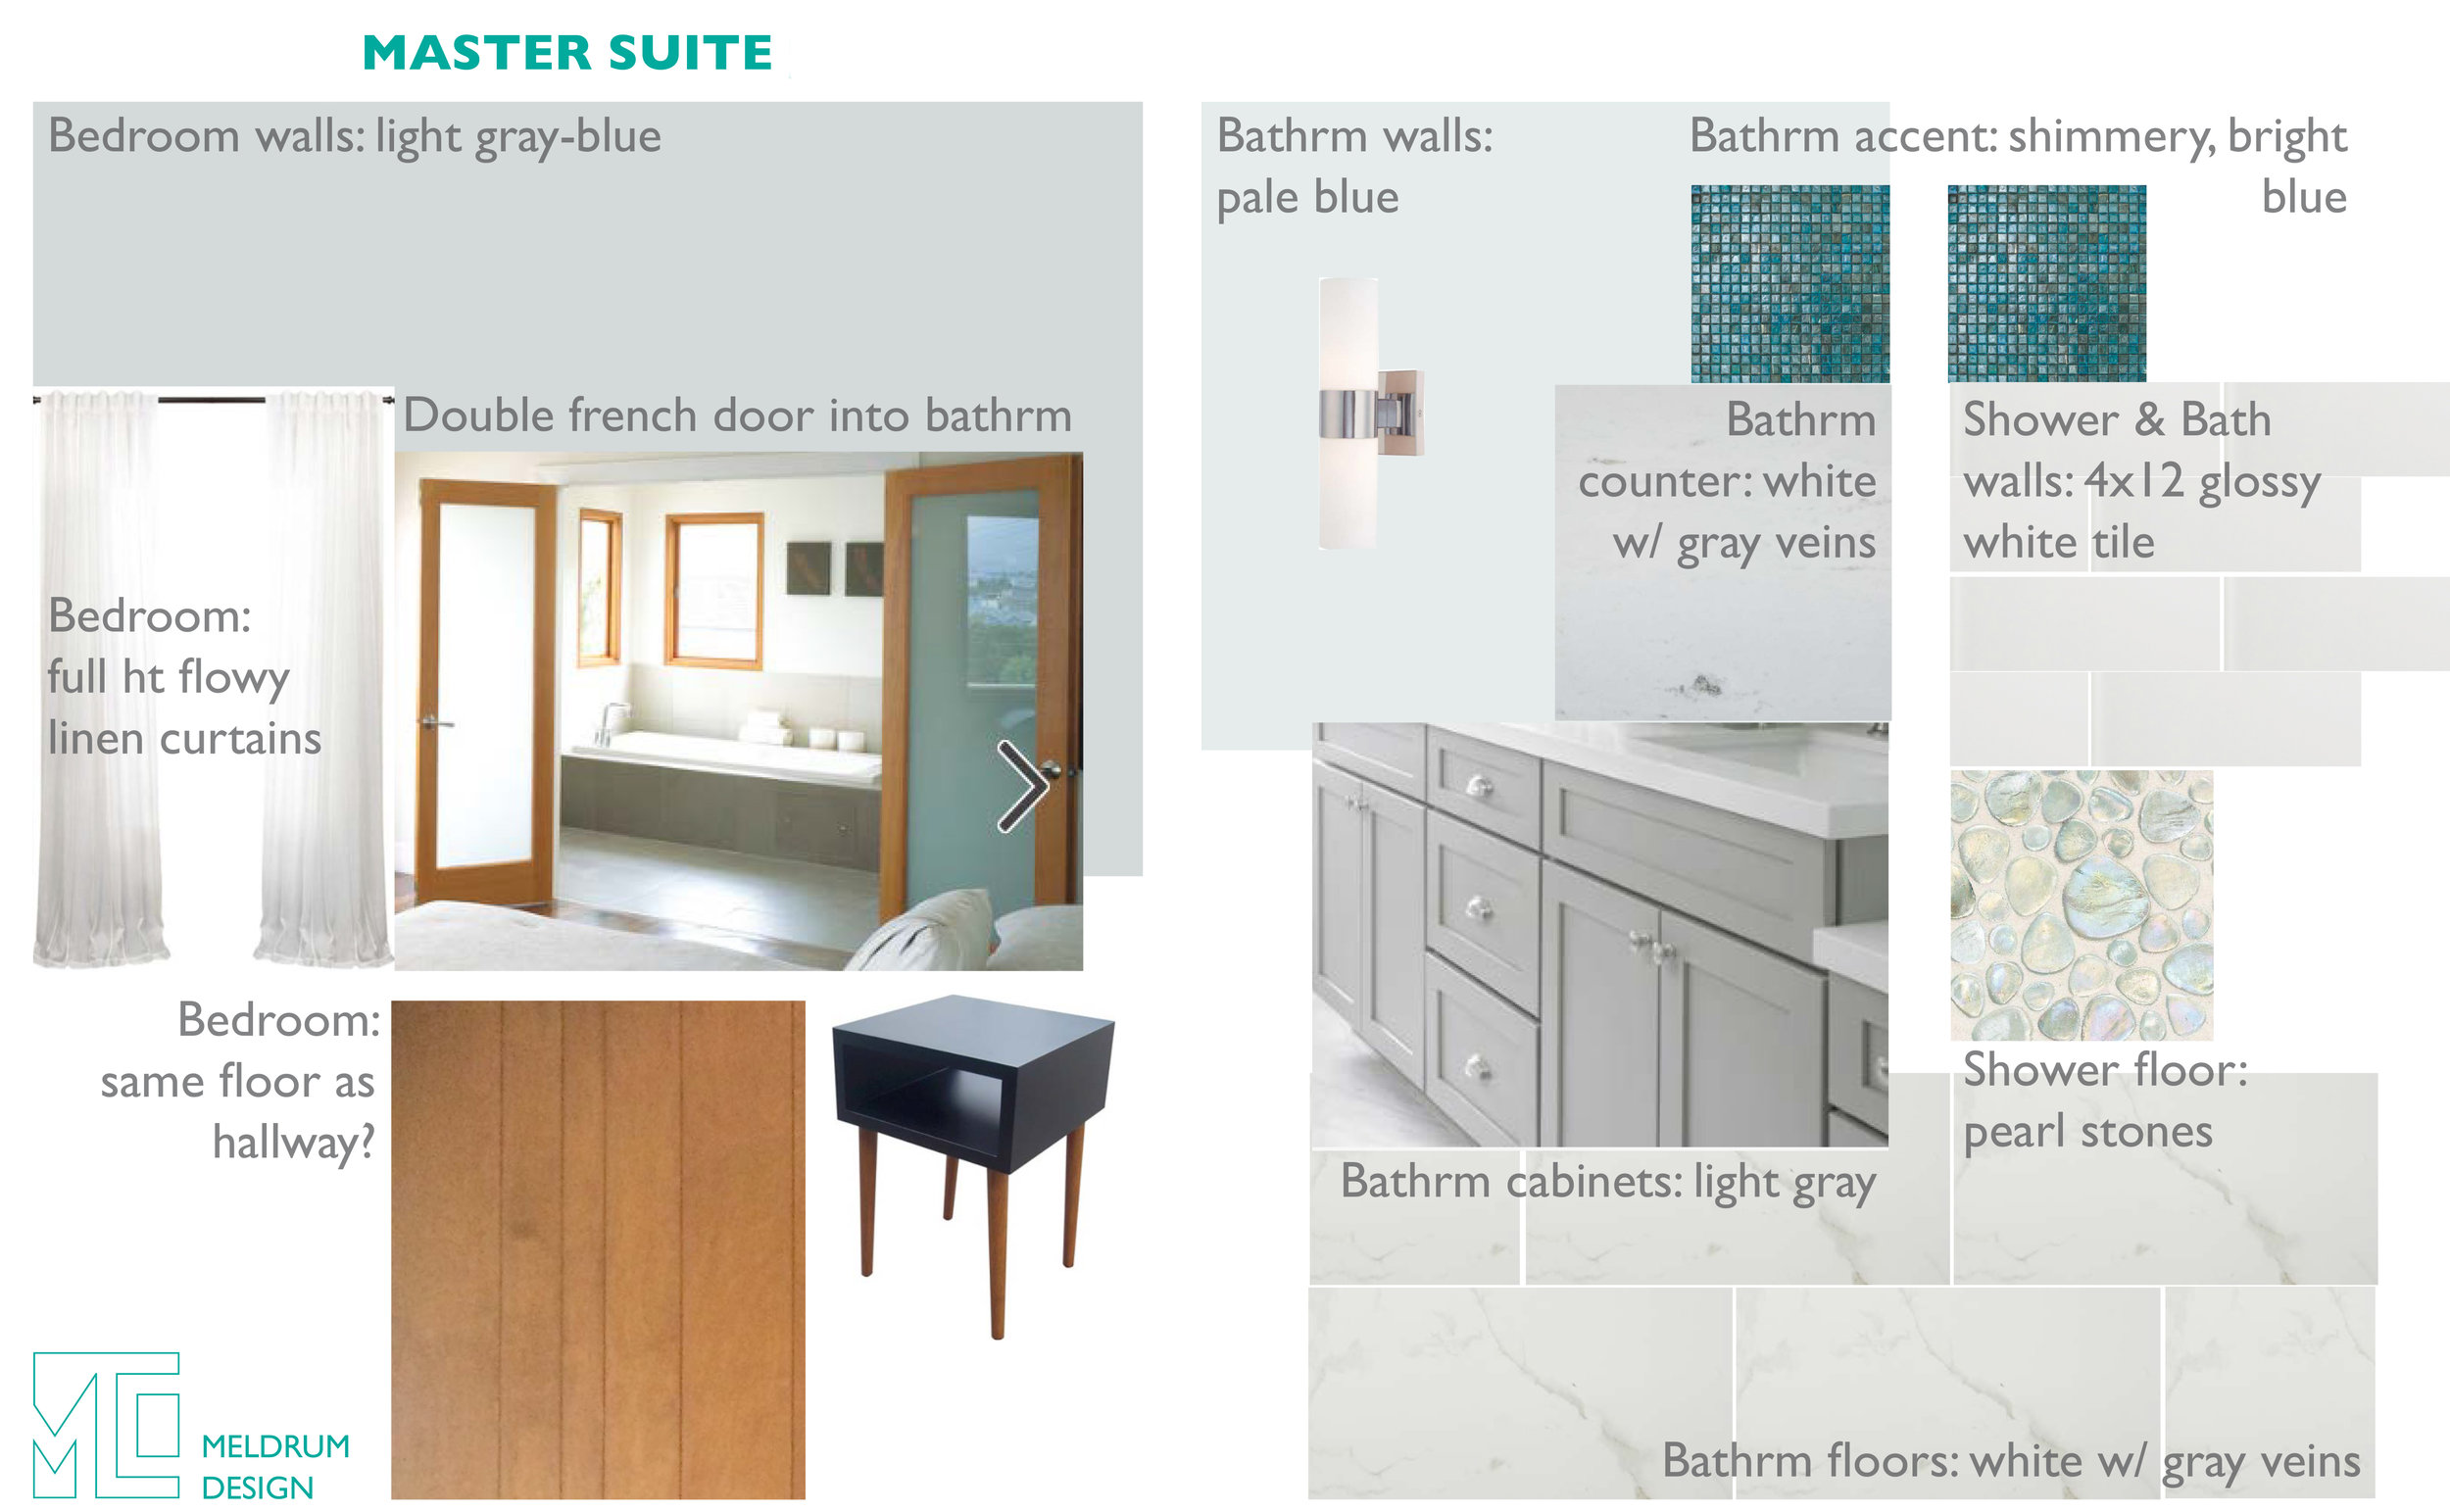
One thing that can make this part easier: a concept board. I make digital concept boards for my clients. Sometimes I create a pretty pre-shopping concept board to guide our style (like the one at the beginning of this article) and sometimes I create a basic post-shopping concept board to double check our decisions (photos of everything thrown together on an 11x17 sheet). In any case, it can be very helpful to see all the materials “together” in one place.
I haven’t mentioned shopping online because it’s actually more difficult than shopping in stores, albeit usually less expensive. You need a practiced eye to make sure the dimensions, colors, & textures are correct on an online order. Plus you don’t get the added benefit of a representative helping you out. Shopping online can be a good way to go but it’s not for everyone.
4. Check Your Work
Bring your material samples to the job site. This is especially important for a remodel. Lay them out side by side in natural light and/or against existing materials. Take a few pictures to keep for your records and for Step #6.
5. Create Your Finish Schedule
Now that you’ve chosen your materials, you need to put the info in an easy-to-read schedule for your builder. It can be daunting. Do I want 1/8” tile grout spacing or 1/16”? *Luckily you have my template to help you out.
As you figure out the details, talk to your material representatives, designer friends (hi!), and even consult Google. You can find anything on the internet!
If you’re working with a store rep, it may not be necessary to fill out allll the details on my spreadsheet. If they’re good, the rep will give you a spec list you can hand straight to the contractor.
6. Deal With Change
It’s inevitable, you’ll wake up in the middle of the night thinking about your backsplash tile. Did you make the right choice? There are so many choices!
Generally, you should trust your initial instinct. But if one of your materials just feels wrong, revisit your store and pick a new one. You should have samples of most of your materials collected, ready for comparison.
There’s no harm in changing your mind early on. But the later it gets, the more time consuming and expensive it is to make changes. And the more annoyed your builder will become. We definitely don’t want that.
So try to stick to the original finish schedule or be quick about your changes.
And voila, there you have it! A complete and beautiful Finish Schedule for your nearly complete and soon to be beautiful new space.
Don’t have time to DIY all this? Let me know. I offer design consultation services to fit almost any budget.
(Full disclosure, I did not go to interior design school. But I’ve helped many clients with their interiors and by now, I know a thing or two.)
*Because I love you, here’s a sample of the Interior Specifications spreadsheet I use with my clients.


